
Facing: A Non-Binding Alternative
Finishing the edge of a quilt with a facing, rather than a binding, is a very useful alternative. This is especially true when the quilt has an unusual shape. It's also a good option when you don't want the visible line that a binding creates. In addition, using a facing can be considerably faster than a binding, depending on which method you employ.
There are several variations for adding a facing to a quilt. All involve sewing a facing to the front of the quilt, right sides together. The difference is the size and shape of the facing, which affects how the back of the quilt is finished. It's easiest if the quilting is completed before the facing is added.
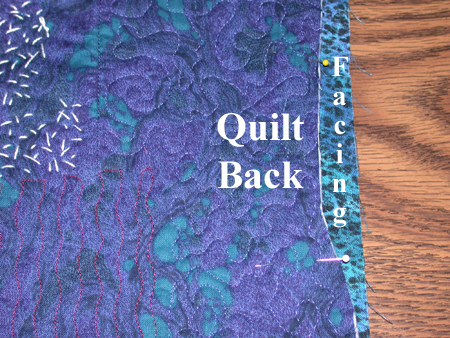
Facing as the Backing (FaB!) - the entire back of the quilt is covered. (Sometimes called the pillowcase method.) This is the fastest method and the one I use. Let's start with the basics and then throw in some variations.
- Lay out the facing fabric right side up. Don't try to cut it to size, just make sure it's bigger than the quilt.
- Put the quilt face down on top of the facing. Pin.
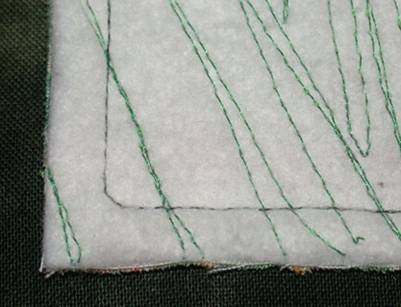
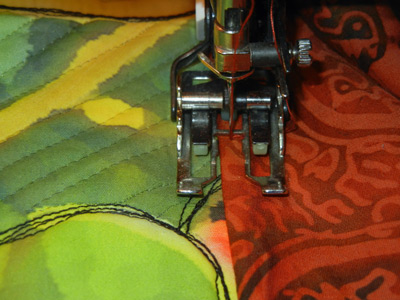
- Using a walking foot, stitch all the way around the edge of the quilt, using ¼” (7mm) seam allowance. At the corners, shorten the stitch length to about 1, and blunt the corner by taking about 4 stitches at a 45° angle. (See below.)
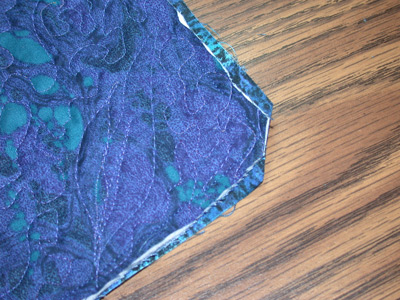
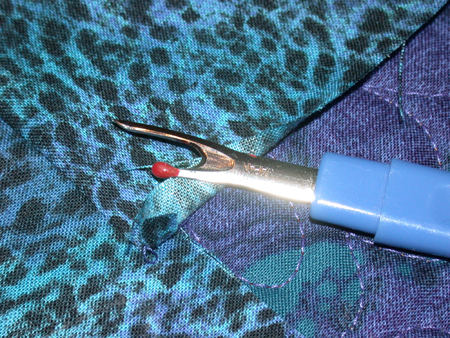
Trim the corners very closely; on a 45° angle, as shown in the photo below. .
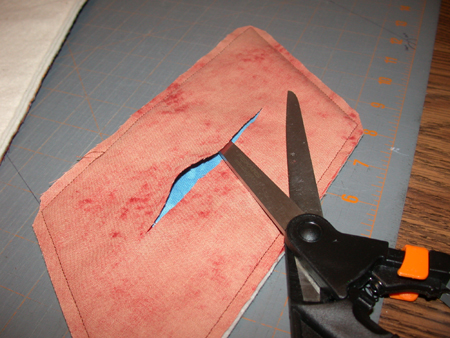
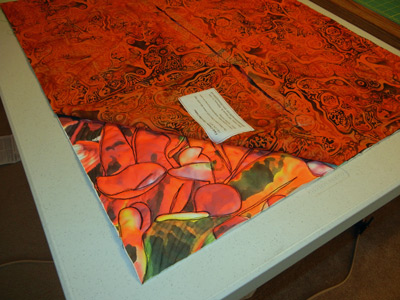
Cut a slit in the facing to create a turning hole. [See below] Turn the facing to the back and press.
Add a label or patch to cover the turning hole. (Note, your previous quilting is now totally covered. To keep all layers fastened, and to keep those judges happy, add some additional quilting.)
Variations:
- Quilt without a backing fabric. The batting will later be covered by the full size facing. (You can even be messy!)
- Before sewing, add a strip of fusible web in the location of the future turning slit. Precut the turning hole. After turning, the slit can be fused closed. Or, you can add a fused patch, if necessary.
- If you've made garments, you're probably familiar with "understitching." This technique helps facings roll to the back. It's awkward to add it to quilts, but very helpful. (*See additional resources at end.)
- Instead of cutting the facing/backing fabric too large, cut it exactly. This additional accuracy will allow you to attach a hanging sleeve, by machine, as well as a label before attaching the facing. (A great time saver!)
Ironing:
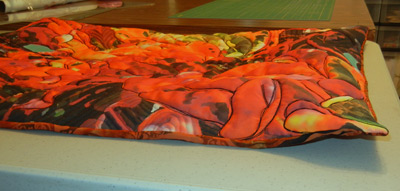
- When the quilt is first turned right side out it will look like a puffy pillow. Ironing will take care of that. Iron the edges from the front, rolling the facing to the back. But don't iron the center portion until you're really ready, because that fusible strip is in there!
Facing as a Frame - the facing is around the edges only. This method takes longer, but it allows the quilting on the back to show.
First, construct and hem the facing frame.
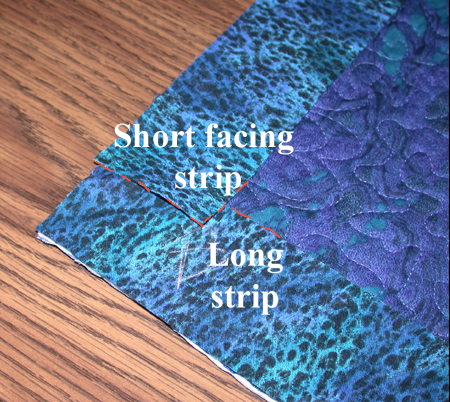
- Cut four facing strips about 2 1/2 - 3" wide. To figure their correct lengths, do this:
- Lay the quilt out and lay two facing strips along the length, in their correct positions. Cut them to the length of the quilt.
- With the long pieces still laying in place, lay the remaining two facing strips along the short sides, positioning them in the gap created by the long pieces. [See below] These pieces should be perpendicular to the long pieces, even if the edges of the quilt have a different shape. Cut them to fit the remaining gap, plus 1".
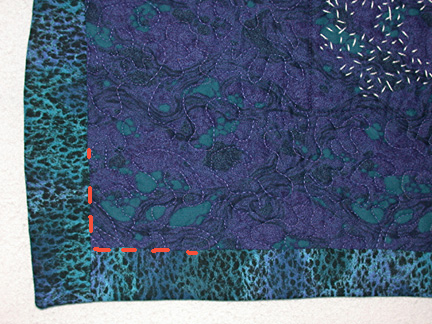
Sew the four pieces together, to create a box. On the inside corners, rip out 1/4" of the seam (or just avoid sewing this initially.) This makes it possible to easily press under a 1/4" hem. [See below]
Press a 1/4" hem toward the wrong side of the facing.
Lay the facing down, right side up. Position the quilt on top, right side down. If the quilt has an unusual shape, the edges will not match and that's okay.
Attach the facing as before. Trim, turn, and press. Slip stitch the facing in place.
If the overall shape of the quilt is not rectangular, the facing will still have a box shape. See a corner example below.
I face nearly all of my quilts, utilizing all four variations. This is super fast! My quilt gallery is full of examples. Here are a couple of my favorites: Reconciliation, Natural Progression.
*Understitching: This is admittedly challenging with a quilt, but it really helps the facing roll to the back so it won't show on the front. See the links below to learn how to do it on clothing. With the frame style of facing, the technique is very similar. If you use the FaB technique the understitching process requires quite a bit of manipulating of the quilt and the facing. You'll end up with a distorted puddle of fabric as you stitch. That's okay. Just keep it smooth right where you're stitching, readjusting frequently.
- Understitching Video (YouTube)
- Understitching a neck facing: article with photos
©2007-2012 Ellen
Lindner
|