
Easy Beaded Name Tag
 |
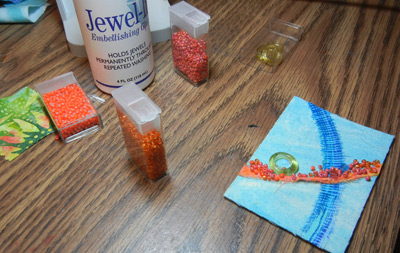
Materials needed: - Stiff interfacing (like Timtex) 3 1/2" x 2 1/2" - Fabrics for front and back, about 4" x 3" each - Fusible web - Fabrics and beads to decorate front - Glue stick - Alene's Jewel-It or other gem glue - Toothpick with a frilly paper end - Name printed on paper or card stock - Small fabric yo-yo |
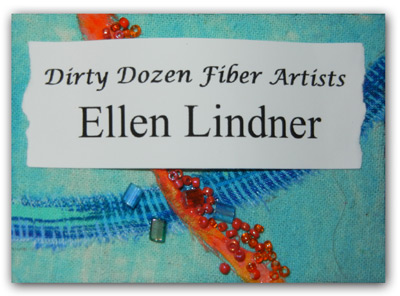
Does your quilt club require members to wear name tags? Mine does, and I've got two in my purse right now. Recently, I needed a new one for another group, and I made this easy version. Try it yourself.
- Following the manufacturer's instructions, use the fusible web to attach the backing fabric and the primary front fabrics to the interfacing. Use a rotary cutter to trim off the excess fabric. Optional: machine stitch around the edge.
- Print your name, etc.onto your desired paper. I used brochure paper (45 pound paper.) This example used the following fonts and sizes: Top line: Lucinda Calligraphy Italics, 14 pt., Name: Times New Roman, 30 pt.
- Cut the printed name to the desired size. Consider cutting it a little too large on the ends, so they may be torn.
 - Experiment with scraps of fabric to use in your design. Remember to plan ahead for the space to be occupied by your printed name. Glue fabrics in place with the glue stick.
- Add beads, as desired, using the Jewel-It glue. To achieve a loose grouping of beads (like the orange ones shown) use the frilly end of a toothpick as a paint brush. Twirl the toothpick while applying the glue. This will give an irregular line. Sprinkle on lots of beads and press them down. Once dry, tap the name tag to release the loose ones. Larger beads can be picked up with tweezers and dipped into a little glue, before placing on the name tag.
- If you'd like the printed name part to be raised slightly, as shown here, glue on a large bead or other obstacle first. Add the printed paper, gluing on just the ends.
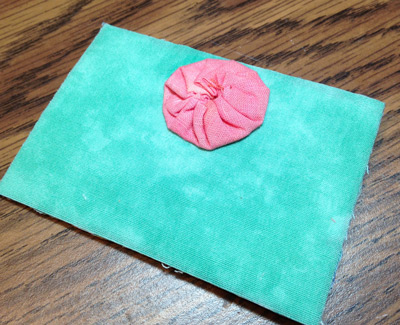
 - Glue the yo-yo on the back. For wearing, pin through your clothes and into the yo-yo.
Variations:
- Glue your name down flat. Do it before adding the little beads and let some spread onto it, as well.
- Elevate the printed paper throughout. Use additional beads, batting, etc. to create some height.
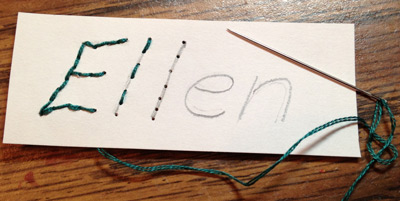
- If a larger font/name size will work for you, consider hand stitching your name onto the paper. This gives a really cool effect. A few tips:
- Use heavier paper
- Lightly draw the name first
- Before stitching, pierce the holes you'll need. This is important, since you'll have no other visual cues when stitching from behind.
- Stitch every other stitch and then come back for the remaining ones.
- Like the hand stitching idea, but can't use letters that large? Try machine stitching instead. Use a longer stitch length and do a little practicing first.
- You don't have to use a yo-yo on the back. Any sort of loose fabric arrangement that can be pinned through will work. If you need a yo-yo tutorial, click here.
- This name tag is the same dimensions as an Artist Trading Card. If you want to make one, do the back fabric first and add whatever business card or paper text you desire. Stitch these in place by machine. Then, add the front fabric and proceed.
If you found this information useful, you may be interested in my other free articles, online classes, and e-books.
You'll find a full directory here.
©2014 Ellen
Lindner
|